Keep these points before deploying your model
— Deploying Model From Platform —
2. Ensure you name your main Python app file as “app.py”.
3. Rename your pickle file to “pickle_file.pkl” (also update this name within the “app.py” file).
4. Additionally, name your requirements file as “requirements.txt”.
5. Adhering to these naming conventions is essential to prevent any errors during the deployment process.
— Deploying Model Directly From JupyterLab —
In HyPy Cloud, you can deploy your model directly from JupyterLab without any time limits for kernel shutdown. However, it’s important to use these resources wisely. Follow these steps to successfully deploy your model:
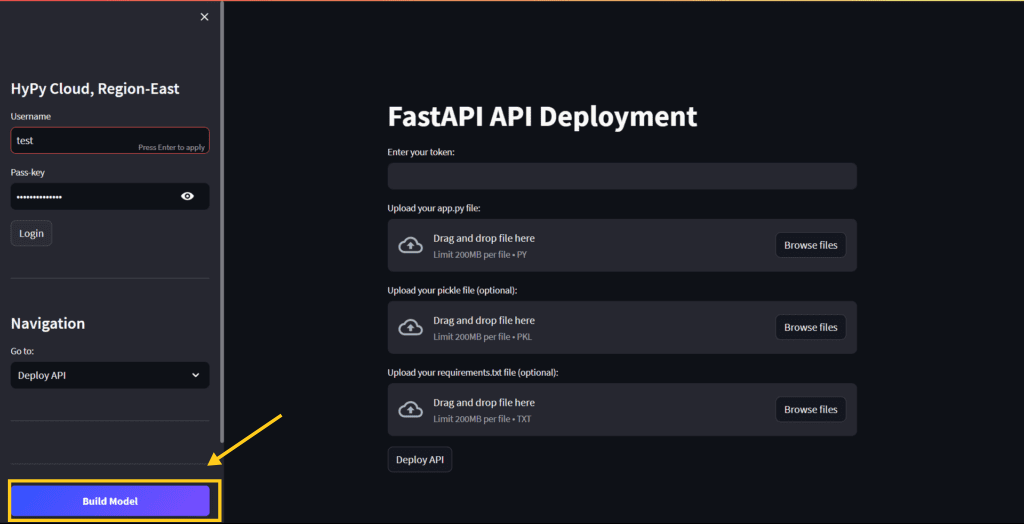
- Visit Build Model & Deploy and Click “Deploy API“, After Login with your credentials in bottom left Click “Build Model“.
- You’ll be redirected to the cloud-hosted JupyterLab, where you can log in to JupyterHub using your credentials. From there, you’re all set to begin constructing or testing your ML/DL Models.
- For Deploying your model to internet you have to create SSH Tunnel for that you need to download & Install bore using command given below:
!wget https://github.com/ekzhang/bore/releases/download/v0.5.0/bore-v0.5.0-x86_64-unknown-linux-musl.tar.gz
!tar -xzf bore-v0.5.0-x86_64-unknown-linux-musl.tar.gz
!chmod +x ./boreFeel free to utilize your preferred SSH tunneling tools like NGROK or Tunnelmole, But “DO NOT USE CLOUDFLARE TUNNELING”. It has the potential to cause your jupyterlab server crash, resulting in the loss of all your work and a potential account suspension. By default, we provide our own SSH tunneling through the Bore Tunnel Service.
4. You’re all set now. You can create an SSH tunnel to your locally running app by simply adding the following command: & ./bore local <local_port> --to bore.pub
Just replace < local_port > with the actual port number where your app is running.
!uvicorn app:app --reload & ./bore local 8000 --to bore.pub
This will give us the following output given below.

http://api.quantumopenai.com:34859 or http://bore.pub:34859— Remember to replace URL port with your assigned
remote_port —
Full Tutorial: HERE
Accessing FastAPI Endpoint using Python (Single and Batch Input)
Single Input:
You can use the requests library in Python to make POST requests to the FastAPI endpoint. First, you need to install the requests library using pip if you haven’t already:
pip install requestsHere’s an example Python script to send a single input to your FastAPI endpoint:
import requests

url = "http://api.quantumopenai.com:XXXXX"  # Replace XXXXX with your port

data = {
    "input": "your_single_input_here"
}

response = requests.post(url, json=data)
result = response.json()

print(result)Batch Input:
For batch input, you can modify the script to send a list of inputs:
import requests

url = "http://api.quantumopenai.com:XXXXX"  # Replace XXXXX with your port

data = {
    "input": [
        "input_1",
        "input_2",
        "input_3"
        # ... more inputs
    ]
}

response = requests.post(url, json=data)
results = response.json()

print(results)Using curl Command on Different Operating Systems
Linux and MacOS:
You can use the curl command in the terminal to send a POST request to your FastAPI endpoint. Here’s how you can do it:
For Single Input:
curl -X POST -H "Content-Type: application/json" -d '{"input": "your_single_input_here"}' http://api.quantumopenai.com:XXXXXFor Batch Input:
curl -X POST -H "Content-Type: application/json" -d '{"input": ["input_1", "input_2", "input_3"]}' http://api.quantumopenai.com:XXXXXWindows:
On Windows, you can use the Command Prompt or PowerShell to send curl requests. However, Windows doesn’t come with curl pre-installed, so you’ll need to download and install it.
You can download curl for Windows from the official website: https://curl.se/windows/
After installing, you can use curl similarly to the Linux and MacOS examples.
For Single Input :
curl -X POST -H "Content-Type: application/json" -d "{\"input\": \"your_single_input_here\"}" http://api.quantumopenai.com:XXXXXFor Batch Input :
curl -X POST -H "Content-Type: application/json" -d '{"input": ["input_1", "input_2", "input_3"]}' http://api.quantumopenai.com:XXXXXReplace your_single_input_here with your actual input data and XXXXX with your port number.
Keep in mind that these examples assume your API accepts JSON data in the request body. If your API uses a different format, adjust the -H "Content-Type" header and the data format accordingly.